
© Robin Brickman. All rights reserved
When Robin Brickman graduated from Bennington College with a degree in graphic arts and botany, she began her career as a freelance illustrator of magazines, trade books and textbooks, medical illustrations, and even postage stamps. When she had children of her own, she turned her attention to children’s picture books and how they were illustrated. Little did she know that she was about to establish herself as an award-winning children’s book illustrator and respected paper artist.
What prompted you to start tinkering with paper? Is there a paper artist who inspired you?
I had been a professional illustrator for 15 years doing pen and ink illustrations and adding watercolor and pastels to my portfolio. I have always liked experimenting with different techniques, and became intrigued by cut paper artwork. Some cut paper artists do work for advertising, either white-on-white or in color, but as 2-Dimensional or flat collage. I studied these styles and thought about what I wanted to do in order to depict nature accurately. I wanted to blend the scientific accuracy I’m known for with color, cut, and sculpted paper. When I discovered I could cut and shape paper art, in the early 1990′s, it was a “Eureka” moment. Initially, I made polymer clay molds of holly leaves and used those molds to shape paper. The leaves were stylized and not accurate enough, so I decided to skip the molding step and just cut the leaves out of paper directly. Paper is a wonderful medium. Depending on how you cut it, expressive and beautiful results can occur. It was transformative for me to begin working this way and allowed me to tap into my drawing skills immediately and comfortably. Although some paper artists use X-ACTO® blades, I use ordinary household and embroidery scissors. My cutting method feels quite graceful and I can do it for long stretches of time. Cutting and painting the individual elements of a painting is more forgiving than conventional flat, or two-dimensional art. Sometimes people think I’ve given myself more work, but I think it’s easier. I never worry that I have to start over with an entire painting if I spill coffee on a chipmunk! Plus, it is easier to change my mind and to reposition the pieces of a painting. This is very liberating. I wanted to set myself apart and the discovery that I could create wonderful sculpted watercolor images marked the beginning of my career as a children’s book illustrator. Some people assume the wood and leaves in my books are real or found objects, but I made them out of painted paper. This work does not happen quickly, primarily because of the scientific research and accuracy needed in my work, not because it is cut paper. I should mention, however, there is an added expense in book production costs for photographing 3-dimensional art. The maximum depth of my paintings is about 3 inches, and this makes them easier to photograph and frame.
Swallows In the Birdhouse was the first book I illustrated in cut paper. The production issues with that book were difficult for the publisher because programs such as Photoshop were brand new at that time. With the next book, A Log’s Life, I learned a lot about how to create the art so that it would be photographed and reproduced to its best advantage. Now there are a number of artists who do cut paper or dimensional art for books, but I believe that I am the only person to work with as much realism and who is creating from paint on paper, only, in my paintings.
How do you and an author work together? Do authors tell you what they have in mind for each page or do you design the art after reading their story?
Children’s picture books are created in different ways. Sometimes, an author and an artist present a collaborative package to a publisher. Other times, an author wants to use his own art or photos. In that case, publishers might tell an author that another artist’s work would be better for the book. For most books the author submits a story to a publisher and the publisher finds an artist for that book. I have been paired with authors by the different publishers I’ve worked with. A publisher might give an author input into the art stage of a book, but that is rare. Book illustrators usually don’t meet the authors of their books. In fact, publishers often keep authors and illustrators apart. My job as an illustrator is to take the author’s manuscript and to create the best possible art for the book. I met Wendy Pfeffer after A Log’s Life won the John Burrough’s Award. An editor at Simon & Schuster paired me with her manuscript. Charlesbridge matched me with Sneed Collard, and I have illustrated three of his picture books: Beaks!, One Night In the Coral Sea, and Wings. I met him after finishing the art for One Night In the Coral Sea. I had help from Stephen Swinburne (author of Swallows In the Birdhouse) for his book. Both Sneed and Stephen provided reference material that helped me create illustrations for their books. Collaborating from the beginning with an author can be very fruitful, though, and I hope to do that with a new author, later this year.
Do you sketch your scenes in pencil first? Do you paint an entire scene before constructing your 3-dimensional scenes?
I sketch out a painting with pencils and tracing paper, after completing the research that I need for accuracy and inspiration. I plan according to a book’s set format, working with galleys or the text after it has been typeset. Sometimes the page breaks are predetermined by the book’s format, as in Beaks! and Wings. Other times, it is my job to pace the text and the art of a book. (Note: A galley is an unedited manuscript)
I start by painting the featured animals and plants, or those that are in the front of a scene. Other times I might start by painting the background of a painting. It has taken me cumulative experience to realize what I want to portray in a scene and how to place things in a painting. The different levels might all be in focus, or some parts might be out of focus as the scene goes back in space. In other words, elements in the front are clear and defined but background elements may be more stylized or fuzzy. This is because a detailed background may not help a painting. Creating these transitions has become easier for me than at the beginning of this technique, but there is still a lot of back and forth. As you can see in the book Wings, the milkweed painting is an example of combining flat two-dimensional art with features of cut paper. Plus, after months of working dimensionally, it was nice to do some elements on the flat surface of the paper!
For stand-alone paintings or commissions, I talk to the client about what they have in mind. For example, one client wanted to commission a painting that related to her husband’s interest in fly fishing. After several conversations it became clear that the Colorado landscape surrounding the client’s second home was important to them, so I included that into the design of the painting.
Which elements of a scene are usually added as a painted background? In other words, are there elements that are always painted?
When I started to develop this type of art, I tried to create everything in cut paper. However I realized I preferred more painterly backgrounds and that it saved me time to make the background a wash of color. As I am cutting out different elements, though, I keep every scrap of paper that is made. I have used these bits of paper, often as small additions, to make a painting more interesting. Keeping all of these scraps both saves me time and adds to the complexity of my work. It is like using herbs and spices when I am making soup!
What other materials do you use in addition to paper?
I use clear or frosted mylar for insect wings. I also use paint mixed with glue (e.g., for eyes) and occasionally I use hair. Hair was used for spider webs and animal whiskers in A Log’s Life. In the book Wings, the dragonfly and the membranous wings of the lady bird beetle were created by inscribing lines into clear film. I then rubbed paint into the indentations. The veins on the termite wings were created by gently cutting into the surface of frosted mylar.
How do you create nature’s details out of paper?
To create an element like an insect, I deconstruct it into simple forms, such as legs, body parts, and wings. Then I reassemble the parts I’ve made. This deconstruction and re-construction step is often hard for younger students to understand, but it is second nature to me. When I create flowers, I cut a flower’s overall shape, like an oval or a sphere. Then I cut the individual petals, keeping them connected at the center of the oval. I will sometimes indent petals or leaves with my fingernail. The paint is darker inside those impressions. The center of some flowers are created by placing bits of paper pulp and painted glue onto a small disk. This disk is then added on top of the petals. By adding painted features I build up what I want to create. Feathers are made by cutting paper edges with scissors, like fringe. The feathers of a bird’s wings are layers of paper that are glued like shingles on a roof. The face of the King Vulture in Wings, was made using more than just cut and painted paper. The wattle is paint and pulp that was placed onto the piece of orange paper serving as the beak. The texture and hairs of the face were created in pen and ink, and the fringe on the top of the vulture’s head is composed of slender pieces of black paper that were glued to the top of the vulture’s head. The logs and dirt in A Log’s Life are other examples of detail. Soil scenes are created with paper pulp, bits of cut paper, paint, and glue. I push down on the pulp to make an uneven surface. I also use paint and additional scraps of paper to create a textured appearance. When people ask me what I do, I tell them I’m a painter. It is my combination of these materials that creates my paintings. If I get backed into a corner, artistically, I will experiment with my art supplies to figure out a solution. I discovered I could use glue to create a water drop on a log, and that hair makes a good spider web or chipmunk whiskers. Even so, the bat wings, in Wings, were difficult to create. The bats in flight required wings that are more transparent and membranous than the bats that are hanging upside down.
Are the raised forms (like tree trunks and branches) paper maché?
No, there isn’t any paper maché. The curves of tree trunks and branches are painted paper, reinforced on the backside with glue and additional paper. Sometimes I use craft wire to support slender branches or twigs. I also make paper pillars to prop things up, but mostly I can use paper pulp and glue to support elements from behind. I have studied bookmaking and paper making, so I already had a lot of book art skills to draw upon.
How did you begin the program you teach at schools? What do you teach?
I started to teach my workshops when my own sons were in elementary school. I was asked to talk about being a book illustrator because it’s an unusual profession. I realized that I liked the experience and I discovered that I had something unique to share — I could bring an art and science component to kids. I also wanted to have a message, namely the science of what I illustrate. As a parent, I knew that young children would get bored by a long presentation. So I created a workshop format where I show photos and movies of what I do as an artist, and then say, “Now it’s your turn!”
Over the past ten years, I developed several workshops based on my book illustrations. The most popular and successful workshop is the creation of a forest or ocean habitat mural. Even the youngest students practice my cut, color, and sculpted paper techniques with these programs. Sometimes the workshops supplement the curriculum at a school but my books are always the starting point. Other workshops are take-home projects, but the community murals stay at the hosting school and they include everyone’s art work in one scene. I like going to schools to demonstrate what I do and to show all ages they can do the same thing on their own using common materials such a paper, glue, paint, and scissors. The larger workshops for younger students use inexpensive paper, crayons, and scissors. I teach watercolor painting and more sophisticated techniques in smaller groups teenagers or adults, and when there is a longer time period available. I present workshops across the country and love doing it.
What do you do with the original illustrations you create for books? Do you exhibit the originals regularly?
I try to. It has been almost 20 years since I began working in my sculpted watercolor technique. A lot of the art from my books has been shown at galleries and in museums. Many of the paintings are in public and private collections, but I own a number of paintings for future showing options and to pass on to my family. I have been honored with three solo shows, one was at the Bennington Museum and two were at the Berkshire Museum. I think it is important for me to show the original paintings because they make quite an impression over the photographed images in the books. I have had several galleries representing me over the years. Currently, I have work in two shows and the rest of the paintings are at home. In addition to art for books, I do commission work for private individuals. Those paintings have been very gratifying to create and I welcome the opportunities to do them. A private commission is a luxury purchase for people, so I am grateful to the collectors of my work.
About Robin Brickman
Robin graduated from Bennington College with a B.A. in graphic arts and botany. She has been a freelance artist since 1976 and a workshop leader in schools since 1999. She has illustrated twenty books, including the following award-winning titles: Wings, One Night In The Coral Sea, A Log’s Life, BEAKS!, and Starfish. Robin has had her work shown in several exhibitions at museums and galleries such as the New York State Museum, the Norma Rockwell Museum, the Berkshire Museum, the Hunt Institute for Botanical Documentation, and the Smithsonian Institution. Robin is a member of the Guild of Natural Science Illustrators, the Western Massachusetts Illustrators Guild and the Society of Children’s Book Writers and Illustrators. In addition to creating detailed paper sculptures, Robin works in pen and ink, graphite, colored pencil, watercolor, airbrush, and pastel dust.
Take a Look!
- See Robin’s painting, “Gambian Epauletted Fruit Bat” in the Image Gallery of the Focus On Nature XI website. New York State Museum (April 29 – October 31, 2010)
- View Robin’s painting in the Vernal Pools mixed media exhibition at the Atrium Art Gallery at Lewiston-Auburn College in Maine (April 23 – June 30, 2010)
- Books illustrated by Robin Brickman
A Log’s Life is available at your independent bookstore.

Read Full Post »
 Trees, Leaves, and Bark (Take-Along Guide)
 The Tree Book: For Kids and Their Grown-ups
 Stikky Trees
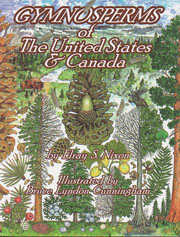 What is a gymnosperm?
 Lavishly illustrated, this guide is a welcome balance of botanical terminology and descriptive illustrations. Dr. Nixon’s jargon-free text is supported by Bruce’s informative illustrations. Dr. Nixon begins his book explaining what gymnosperms are and where they can be found. He then provides clear instruction on how to use identification keys and teaches readers how to begin thinking about cones, leaves, and bark — the three characteristics which are the focus of this book. Dr. Nixon focuses on these characters because they are observable throughout the year.
  and clear descriptive text make this guide a great resource to use when learning about the gymnosperms in your area. This guide also serves as a gentle introduction to dichotomous keys. If you have avoided plant keys because of the botanical terminology they contain, you might want to try the keys in this book. Dr. Nixon provides concise definitions to the botanical terms you need to know and Bruce provides an illustration for each term. This all-inclusive resource is sure to be a welcome companion on your next trip to your local forest or national park.
 In Realistic Textures, Diane leads readers through a progression of exercises involving mark making and the creation of pencil washes using water-soluble graphite and smudging techniques. Diane’s demonstrations illustrate clearly that a pencil is more than a simple note-taking tool. While it may seem you’re playing around with pencil marks that will never be used on botanical subjects, Diane demonstrates otherwise when she shows artists how to apply tonal values and pencil marks to create form. Eight pages of Realistic Textures are dedicated to the creation of botanical textures. In this section, artists learn how Diane creates…
 In this book, Diane provides many helpful tips, exercises, and pencil drawings to demonstrate how digital cameras can assist artists with their drawings. Diane shows artists how to recognize distortion, how to create distortion intentionally in their photographs, and how to correct for distortion in a drawing. She also demonstrates how to set up a value scale and how to identify a subject’s core value. Instruction in composition, lighting, how to work with several photo references, and how to capture details is also provided.
 In this book about our favorite subject, Diane explains how botanical illustrators can use different techniques to create texture and values. Botanical artists will learn about graphite powder, graphite washes, and carbon pencil — tools not normally discussed in a botanical art class. Artists will also learn the value of creating a reference collection of flowers, flower heads, stems, leaves, leaf attachments, and reproductive parts for each specimen before combining these elements into a single composition. Eleven projects are presented by Diane, each one bringing attention to a different aspect of drawing. The projects and the key skills learned in each are as follows:


